PERSONALIZE YOUR COMPUTER
Part I: Sights:
When you turn on your computer, you see various things on your screen. You may have bars along the top and/or bottom and pictures and icons.
Many of these items can be changed or personalized. You make the changes by using the Display Properties Dialog Box. So, the first thing you need to know is:
A. How to get to the Display Properties Dialog Box
This is My "Desktop":
The central area (now outlined in white) is called "Wallpaper".
The entire screen is your desktop. If you are displaying a picture(wallpaper) in the middle, of your screen, the rest of the screen is then called "pattern".
If you haven't done so before, please resize your screen so that you can read this material and also see your desktop. How to do that was covered in the Preview to this section and also in Lesson #2 of How-To...
To change your Desktop and/or Wallpaper and/or Pattern, you need to go to the :
"Display Property Dialog Box".
which looks like this in Windows 98® (slightly different in Windows 95®):
Below are some ways to get there.
- In the center of your desktop, not touching any icons, click your RIGHT mouse button.
A menu will pop-up. Choose "Properties".
(To highlight an item, point and click on the item...it will develop a blue rectangle around it.
To Choose the item, double click on it.)
OR
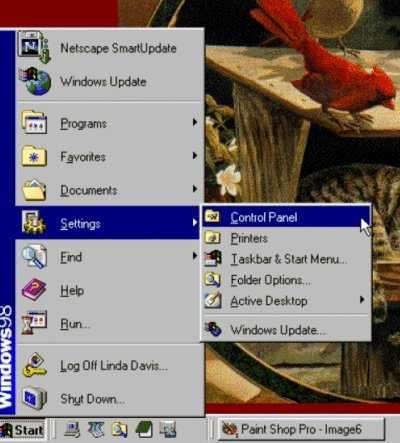
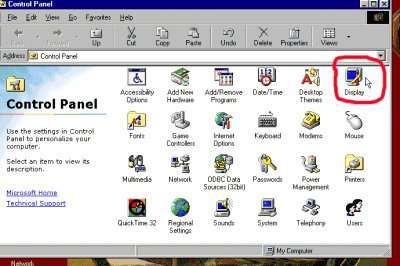
- Click on the Start button at the bottom left hand corner of your screen. Choose "Settings" and then "Control Panel".
Double click on the "Display" icon.
OR (if you have Windows 98*)
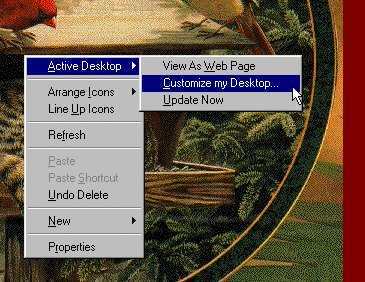
- As in the first method, RIGHT click in the middle of your screen and choose "Active Desktop" and then "Customize my Desktop"
B. CHANGING THE SETTINGS
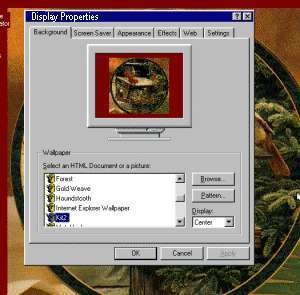
OK, now that you've gotten to the "Display Properties Dialog Box", you will notice that there are tabs along the top. Windows 95* has 4 tabs and Windows 98* has 6 tabs. We are only going to work in the common 4 of them.
The four tabs we will use are Background, Screen Saver, Appearance, and Settings.
Windows 98* added "Effects" and "Web".
You should be in the "Background" display area.
You will see an area in the lower section of your window named "Wallpaper". Your computer comes with a variety of wallpaper selections. Highlight any of them and you will see a preview in the "window".
Notice also the area on the right side of your wallpaper section that there's a button called "Browse" and an area called "Display". The "Pattern" button is on the left in Win95* and the right in Win 98*.
The Display area allows you to select either Center or Tile. (Win98* added Stretch.)
Use one of the Display characteristics as you look through the wallpaper selections and see the changes. For example, some of the wallpapers don't look like much in the centered display but come alive if you choose Tile. (Try black thatch, houndstooth, or bubbles).
To see how any of them will look on YOUR computer, highlight your choice and then click APPLY on the bottom right corner. Don't be afraid. The monitor screen will change, leaving the Display Properties Box open so that you can try other options. (If you click on "OK", the Display Properties Box will close.)
Have some fun and experiment.
Find the settings that you like.
Earlier we said that your computer comes with a selection of wallpaper and desktop pictures. If you click the BROWSE button, you can "browse" your computer for picture files. You may have a folder of "clip art" from another application or you may have downloaded a picture off the internet. You can use any .bmp file as wallpaper. (More about file types later.) Your options for your desktop/wallpaper are not limited to the ones you see listed in your Display Properties Dialog Box.
You can add pictures from a variety of sources. That subject is covered in Part III.
For now, though, let's go back to the Display Box.
OK, let's say that you've chosen CLOUDS and you want it just in the center of your screen but you don't like the area surrounding it that is set on your computer. You can change the pattern and the color of the surrounding area. Click on the Pattern button and another window will open giving you a variety of options.
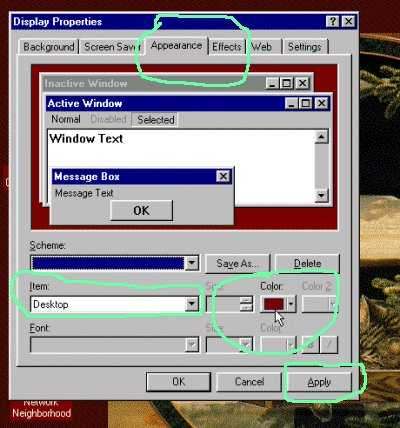
You will notice that all of the choices in the Pattern area are the same color as what you already have on your desktop. In order to change the color, you need to go to the Appearance tab.
About 2/3 of the way down you will see a box that says "Item: Desktop" and to the right of that is a box that says "Color:" This box is displaying the current color of your desktop. Click on the arrow to the right of the color and a menu will appear. Choose the color you want and then click "Apply" and see the change. You can go back and forth between the PATTERN and the COLOR choices to find some combination that you like.
There are several more ways to personalize your computer from the Appearance tab.
C. APPEARANCE
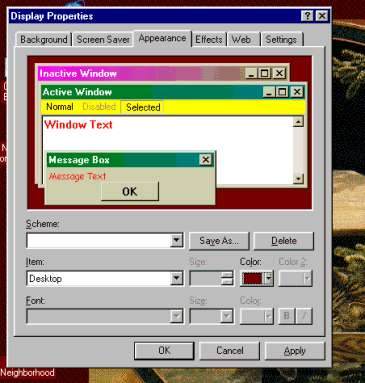
You'll notice that at the top of the Appearance Tab Window are examples of three "windows" -inactive, active, and message box.
You can change the color of the title line (which is normally dark blue) and the color of the box itself, (which is usually gray), and the color, size, and style of the font (print).
These changes can be made in the "Scheme:" area. Press the small arrow to the right and a pop-down menu will appear.
Notice that as you highlight each of the choices that your background color changes as well as the small color selection box to the right of Desktop. You want to keep that in mind because the color in the Color box is the background color for your desktop. You can choose a different color, however.
For example if you choose "Desert" the title box becomes aqua, the boxes themselves become tan, and the background color changes to a soft brown. If you want to keep your background color maroon like mine is, you can choose maroon from the Color box and the other changes remain.
You can also make a change in only one of the windows or to the text displayed inside them by clicking on the arrow to the right of "Item: Desktop". If you choose Active Title Bar, for example, you can change the size of the bar, the colors used, the font (style, size, and color of the print) for the Active window Title Bar only. Then you can choose and change "Menu" (the line which says "Normal", Disabled", "Selected").
Again, play with the options to see the endless variety of choices you have!!
Just For Your Information, the print you are reading now is "Comic Sans MS (Western).
The other two buttons on the Font line are B for BOLD and I forItalics.
To return to your original settings you can choose "Windows Standard" in the Scheme box, "Desktop" in the Item Box, and the correct color in the "Color" box or press the Cancel button and leave the Display Properties Box.
If you find something you really like and want to keep it, press the Apply button. Remember, you can always come back and change it again!
But say, for example, you create a "look" that you want to use but you aren't the only one using this computer and the other person wants to create a look of his/her own. You can then save your changes by pressing the Save As button and giving your look a name. That way you can access your own selections by just opening the Display Properties Box and choosing it from the Scheme menu. And the other personcan do the same. If you decide later that you really don't like "your" look, you can delete your chosen scheme and create another. This is a great option for kids...to each have his or her own "look".
D. SCREEN SAVERS:
Your computer comes with some screen savers. Open the Screen Saver Tab and look in the Screen Saver box for your choices.
If your computer is idle for a given period of time, the screen saver will kick in. This is important to prevent burn-in of your monitor screen.
Click on the Settings box and you can define your own preferences even finer.
Click Preview and the screen saver will fill your screen. (Press any key to return)
You can also set the time limit for your computer to sit idle before the screen saver begins. You don't want it to pop up while you are taking a minute to think about something but you also don't want the time frame to be too long. (Mine is set for 14 minutes.)
One of the other options you have in Screen Saver is a "Scrolling Marquee".You can type in a phrase and have it scroll across your screen with options available for font, color, placement, etc. Have a look! This option is used in stores to attract your attention. Movement captures the eye!
Win 98* has added an Energy Saving feature for your monitor. The settings will have been determined in advance and options are only available if set up by the manufacturer.
E. SETTINGS
Depending on your monitor, there are two settings you can change from this screen: Color and Screen Area.
Your Screen Area can be set at 800 x 600, 1024 x 768 or 640 x 480 pixels.
Standard VGA monitors use the 640 x 480 resolution and 16 or 256 color.
Super VGA monitors use 800 x 600 pixels and 16 or 24 bit color.
If you change monitors you might want to try playing with these settings to see if it improves your picture. The monitor you are using is identified in the "Display:"
Clicking on the Advanced button will show you more options regarding your monitor display, refresh rate, etc.
Windows 98* also offers two more tabs, Effects and Web. These are covered in Part V: Windows 98* and Active Desktop.
We've covered Desktop, Wallpaper, Title Bars, Fonts, and Screen Savers so far.
Not a bad start!
F. ICONS
Let's talk icons for a brief moment. If you have ever worked in an office, you know that some folks like to keep everything in drawers and have only the papers they are working on at that moment on their desktops. Others like to have everything out on top of their desks. Your desktop is like that.....it is up to you to decide if you think icons sitting on top of your desktop make it cluttered or convenient.
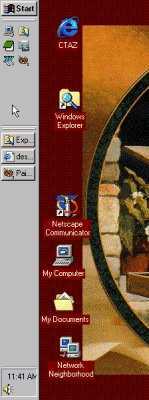
The icons represent shortcuts to programs. You can access all of your programs through either Windows Explorer or your Start Menu. The icons you see on your desktop provide an easier and faster way to access the programs you frequently use.
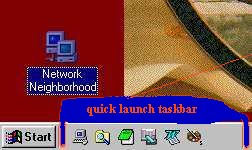
Windows 98* users also have the choice of keeping icons on their desktop or having them on the Quick Launch taskbar.
The main difference in the two locations is personal preference and an icon on the Quick Launch taskbar requires only one click to open a program while an icon on the desktop requires a double-click.
You can even move the entire taskbar to any edge of your screen simply by pointing your cursor on any blank area of your taksbar and hold down your left mouse button while you "drag" to another screen edge. Release your mouse button and the taskbar will move.
To create an icon on your desktop:
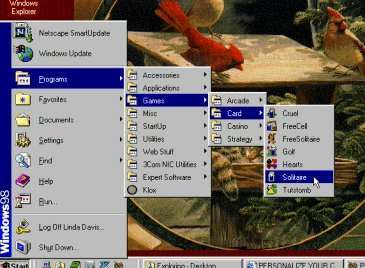
Let's say for example that you like to play Solitaire a lot. The way my Solitaire game is set up, I have to go to Start, Programs, Games, Card, and then finally get to Solitaire.
It would be easier if I could just click on a "shortcut icon" to play.
Go to Windows Explorer. Its icon looks like this:
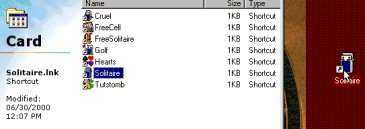
Highlight the program that you want to make a shortcut icon for. On the File menu, click Create Shortcut. A new selection will be created at the end of your list of files. It will display "Shortcut" under the "Type" of file list.
Drag the shortcut icon onto the desktop. (To drag something, point to it with your mouse pointer, left click to highlight your selection and without releasing your left mouse button, move your mouse in the direction you want the item to go. When you get there, release your mouse button.)
In my example I went to C-> Windows-> Start Menu-> Games-> Card. I highlighted my Solitaire shortcut and dragged the icon and name of the game onto my desktop.
Now anytime I want to play Solitaire, I only need to double-click on its icon. If I don't want my desktop cluttered with a whole bunch of icons, I can move it down to my toolbar simply by dragging it into the Quick Launch taskbar. (Available only in Windows98*)
To delete a shortcut, drag it to the Recycle Bin or right click on it and click the Delete option. Deleting a shortcut doesn't change the original file but be sure that it is the shortcut that you are deleting and not the file! Right click on the icon and select Properties. Under the General Tab you will see that the Type is Shortcut and there should also be a Shortcut tab which will point you to where the original program lives.
(For more detailed instructions, see How-To..., Lesson #8.)
Let's move on from what you see to what you hear!!
Click here to return to the table of contents, then go to Part II: Sounds
*Windows* refers to Microsoft Windows 95® or Microsoft Windows 98®.